Showing posts with label Kingdom Death. Show all posts

Saturday, December 7, 2019

Hot of the Desk: Kingdom Death Gigalion


Harsh Kitty. Mean kitty. Little ball of teeth. Angry kitty. Hungry kitty. Kill. Kill. Kill.


I'm following a set of self-imposed color rules for my KDM set. If this is your first post in the series (see summary page), here's the part that I copy/paste:

-----
Color Choices:  For my KDM set, I'm using an airbrush to provide shadows in a pseudo-statue, almost monochrome paint scheme.  I want a lot of high contrast from light to dark, with near-black in the shadows and near-whites in the light.  I'm using warm colors (creamy grays, buttery whites, and a bright mustard yellow) for the SURVIVORS and cool colors (blue-grays and a neon blue) for the MONSTERS.
-----

I actually bought 2 of these kits at Gencon - one to assemble FAST and get on the table, and a second for a future competition piece.  This is the FAST version; as such I decided to use my old Kingdom Death recipes for colors and application.

It's pretty interesting to go back and try to replicate an old paint scheme.  It's been quite awhile since I'd painted this scheme, and I was teaching myself to airbrush when I set out with the 1.5 Core Box.  Since then, I've done dozens of other pieces and this fairly simple theme was kind of refreshing.

Sunday, December 1, 2019

KDM Thanksgiving Showdown


Quick post, on the Sunday after Thanksgiving.

This year, instead of family traditions, we accepted an invitation to go hang out with friends.  This is a group from across the country that manages to assemble a few times a year for shenanigans. 

This invitation involved a several state road trip, so we set out mid-morning on Wednesday and arrived Wednesday night.  Since we rarely take ANY additional vacation at Thanksgiving (and normally work Black Friday) we were off our usual routine straight out of the gate.  (I could post separately on the evolution and end of family traditions, but won't right now).

Sunday, July 21, 2019

Broken Token Dead Kingdom Insert

Fighting entropy, one laser cut sheet at a time.

Ok, confession time.  My copy of Kingdom Death has been pretty dusty.  What little gaming time we've committed has been Shadows of Brimstone while KDM sat unused.  Meanwhile, I've been painting more and distracted by "real life" and [insert cliche'd excuses here....].

Anyway, with other distractions, it's been months since I've had KDM out.  But, with Gencon close and a barrage of comments from Poots on the kickstarter, I've had the KDM itch again.  Last night, while rearranging some things in our gaming nook, I came across the Broken Token Dead Kingdom storage tray that I bought at PAX Unplugged 2018 but never assembled.  On a whim, I got the glue out and started assembly.

(Never ignore the fit of inspiration when it happens....).

Pictures and notes with bullet points after the break.  Bullet points are cool.

Monday, February 4, 2019

Dog Might Games: Custom Kingdom Death Gear Grids

Looking back through my posts, I realized I never actually uploaded these pictures.  Let's fix that!

Very early in our KDM career, I knew that the stock cardboard grids that come stock in the game were a pain.  If you look away for a SECOND, the gear cards spin and dance and rearrange themselves.  

I wanted a solution.

But I was picky.  There were some acrylic and laser cut ply options on the market, and 3D printable files around, but I wanted something a little more ... deserving ... of the great title that KDM is.

At PAX Unplugged 2017, I stopped in at the Dog Might Games booth and struck up a conversation with someone that I would later know as Zoey.  

I had a particular request - Gear Grid for Kingdom Death.  She politely pointed me at some of the other card and table organizers they had in stock, and I kept shaking my head.  We had an otherwise great chat, and Mrs. Zoxe found a prototype dice box for sale from their PAX stock.  And, after a return trip or two we caught up with Konas, one of the founders at DMG.

I wrote up my idea, did some sketches in MS Paint, and sat down with real cards and took some dimensions.  They were receptive to the idea of a custom commission, but wary because a) the cost would be spendy and b) they were really (super mega) busy.  I think maybe I had to convince them that I was serious. :)

We traded emails back and forth over the coming months, and this past September, they were able to work me into production.  


KDM Gear Card being measured; yes, I broke out the calipers.

With so much BoRo at risk, they cut a prototype and shipped it to me.  I loved it, and brought it back to them at GenCon 2018 with final tweaks.

Unboxing.

All four player stations in a big row.

The first words from the KDM manual included as an engraving:  "Once upon a time there was a place of carved stone faces."  (Harder to read in the glare than it is in person).

Side view showing magnets for future Component Collector integration.  Each pocket is sized to take a single 2x2 gear card and is angled a bit for easier readability.

And they felted the back.  Super cool.

This was a super splurge on my part but they came out wonderfully.  And you might think that it's a lot to spend for a single game title (you'd be right), but they do have uses beyond KDM.  One or two on the table make a wonderful collection point for tokens in almost any game.

I didn't post these pictures initially because I didn't know if DMG was interested in building more, considering all the other projects they have going at once.  Konas later said they'd build more if people are interested, and for my part I don't claim any particular ownership over "my" design.  It was a great collaboration, and if DMG can put a few more on the street, it's fine by me!

Dog Might was fantastic to work with.  I've gotten to know the gang a lot better through their forum and am happy to see their business continue to grow.  Since that first PAX, we've added several other DMG pieces to our table and I'm happy with them all.  But the real showcase are my Gear Grids.  

Wednesday, September 5, 2018

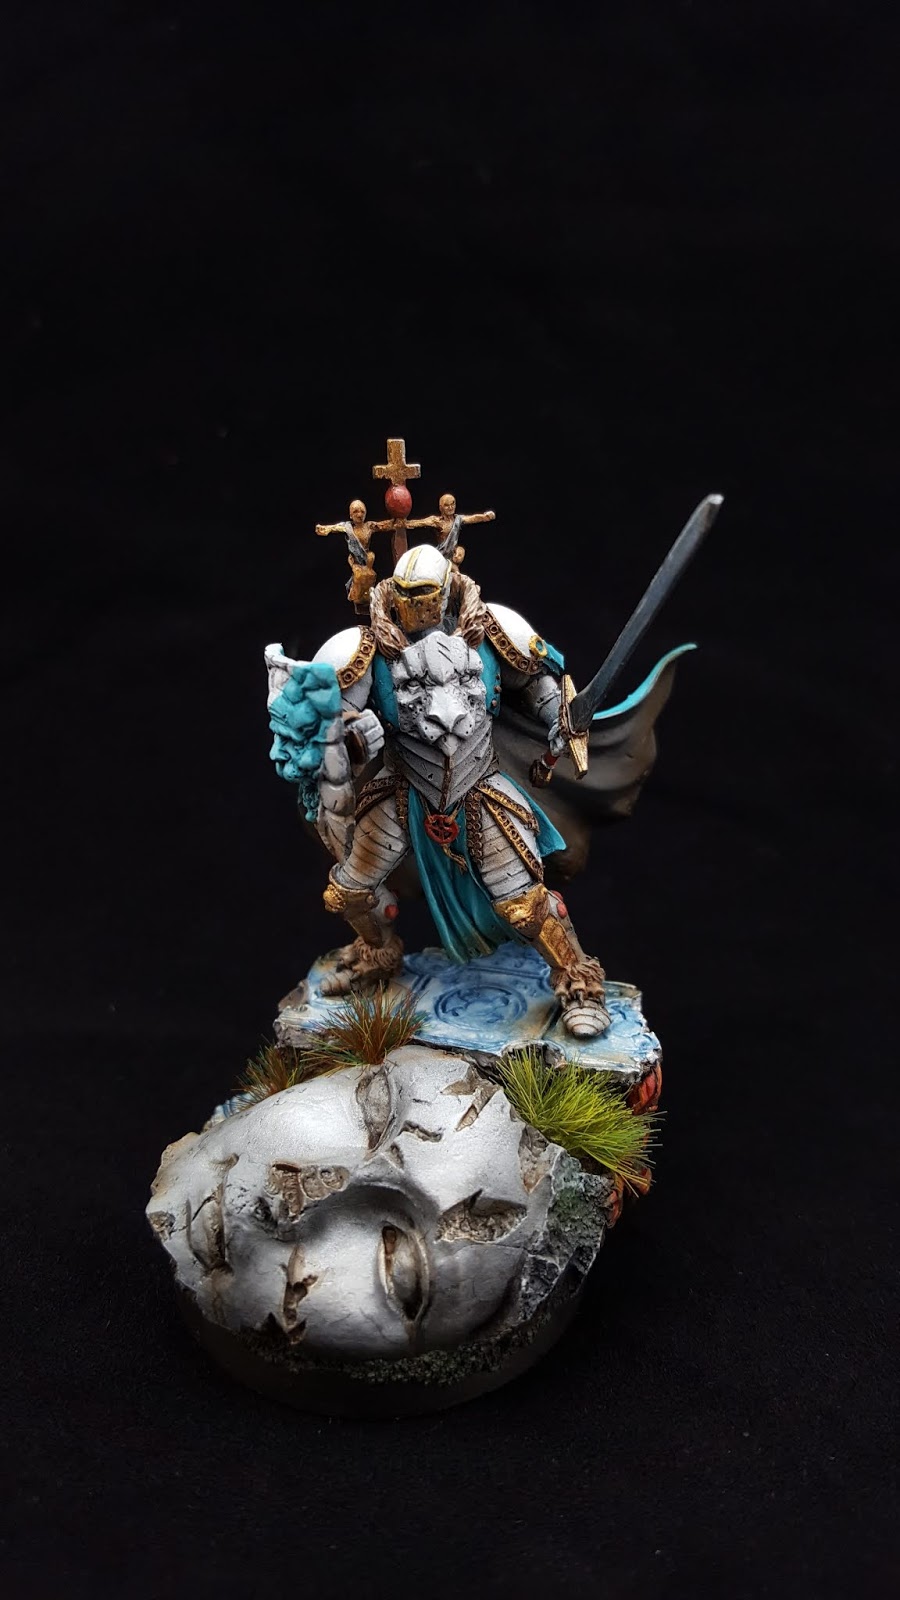
Hot off the Desk: Kingdom Death White Knight


Kingdom Death White Knight on a Scibor base.

Now that the Miniature Monthly Masters entry window has closed, I'll post pictures of my entry!

*fanfare noises*  Kingdom Death White Knight!

A few random notes:
  • He was truthfully one of the best models to assemble.  The resin was super clean and easy to work with.  
  • What you're seeing is a mix of hand-brushing and airbrush work.  I alternated both methods throughout - basecoating as well as shading.
  • I started with my usual airbrush-applied primer (Vallejo Surface Primer, Black) and then worked up through several shades of gray to pure white before basecoating the other colors.
  • The marble floor result was almost totally an accident.  I bought the paint (Reaper Pearl White) to put me over the top to get free shipping when I ordered the Teal.  I started using the Pearl only because it was "new" and then realized that it's actually a "metallic" and somewhat translucent. Initially I was unhappy with it because it was thin - took several coats to cover and hard to control ... I was worried about filling in the floor texture detail.  Then the blue ink over the top really surprised me; I almost did something else entirely.
  • The stripe on the shield was masked and airbrushed, then I accented the highlights on the teal.
  • I was originally going to airbrush a bright gold ink on the shield instead of the stripe.  It would have made the shield a white with translucent gold with dark gold in the recesses.  I'm happy with the stripe but might save that idea for another figure.
  • As I was painting the two figures on the wooden cross, I was highlighting their rag coverings and discovered that there aren't 2 figures, but actually 4.  If you look closely, there's a 2nd figure on each side grasping at the other figure's waist.  They're tiny!  There isn't much lore on this figure, but I took that represent the Strong protecting the Weak and made me like him even more.


Some Work in Progress photos:

Mockup after assembly to check compatibility with the base.

First attempt at the tunic shading and gold basecoating done. Starting to highlight gold.

At this point I've mocked up the fur, but ultimately wanted it less brown to stand out from the gold more.

Raw airbrushed shield; masking and teal stripe will be applied later.


And the final submission photos:

Sword arm view.  All of the gold was basecoated and highlighted by hand (Reaper products).  The plant and some of the gems/detail and sword grip are Reaper Rusty Red - one of my new favorite colors that was recently discontinued (!!)

Rear view. The cloak was airbrushed and then highlighted by hand. I tried to accent the base with two colors of brown to make it look like silted sediment.

The base 'face' was basecoated by hand and then shaded with inks and highlighted with Reaper Pearl White. I used the Sotar 2020 for detail work.

Closer shot of the Shield.  I tried to shade the leg/thigh where maybe the (heavy) shield might rub during a long day of travel.


Monday, March 19, 2018

Unboxing: KDM Wave 2

Last week was a crazy week, followed by a crazy (but fun) weekend out of town.  On Friday, I was supposed to leave the office by noon but had 3 things that had to get submitted.  But at 3pm, I was still at my desk, madly clicking away.  Finally got free at 3:15, raced home to pack a bag and get back in the car, and we were off for the weekend.

(But that's the content for another post).

Fast forward, we pulled in the driveway last night at 11:45pm, I was back up at 5, and put in another 9.5 hr day today at the office.

By the time I got home, I had totally forgotten that I had tracking information for the infamous Kingdom Death, Wave 2 expansions indicating a Monday arrival.

But there they were, waiting by the garage.  I blinked, then got out of the car, and in exchange for feeding the cat, she supervised the unboxing.

As a Satan's level backer, I got all 12 of the legacy (1.0) expansions.  These were packed at the factory into "Expansions of Death 1" for easier shipping.  But, a few months back, Poots opened the backerkit up, and I added on the Green Armor and Flower Knight so that I had a spare set of some really cool armor at Kickstarter prices.  I wasn't sure how these would ship, but unsurprisingly, I received not one, but TWO tracking numbers.  Both arrived on the same day.

Lastly, I am apparently at the head of the wave 2 cycle for shipping in the U.S.  Intentional or not, it somewhat makes up for the longer wait I had at Wave 1.

So, without further adieu, here are the pictures.

Box markings.

KDM rulebook (and supervisor cat) for scale. Note corner damage lower right.

Opening the small box containing the duplicate models I procured.


Small box:  cosmeteic box damage in the Flower Knight from being squished against the Green Armor sprues.

Expansions of death, first glimpse.  Cardboard is much thinner than the core box and of similar density to a normal Amazon box.  There was a cardstock "knife protector" that separated the product from the tape seam that I removed for the shot.

First expansion out of the box.  Dragon King!

Corner damage on 2 of the 4 bottom corners.  Poor Slenderman got the worst of it.  If I were collecting or reselling, I'd be pissed.  Actual game contents were unharmed, and I'll be disposing of the packing (eventually) so I shall scowl and then get over it.

This is the shot I was after.  All 12 legacy expansions stacked on the core box.  And you know the core box ain't small.  I'm a tall guy and this stack is at least 6 inches higher than my knee.  This shot does NOT include my duplicates.

Another perspective shot.  Let the clipping and glue sniffing begin!

Monday, February 19, 2018

Hot off the Desk: KDM Watcher

Luke: "I don't know ... I feel like...."
Yoda: "Feel like what?"
Luke:  "Like we're being WATCHED."

As we've gone through the HotD series for KDM, my posts have gotten longer and longer.  Let's break that trend with the Watcher.  This is the last boss in the core box, and I'm just continuing to follow my recipe.

I'm following a set of self-imposed color rules for my KDM set. If this is your first post in the series (see summary page), here's the part that I copy/paste:
-----
Color Choices:  For my KDM set, I'm using an airbrush to provide shadows in a pseudo-statue, almost monochrome paint scheme.  I want a lot of high contrast from light to dark, with near-black in the shadows and near-whites in the light.  I'm using warm colors (creamy grays, buttery whites, and a bright mustard yellow) for the SURVIVORS and cool colors (blue-grays and a neon blue) for the MONSTERS.
-----

Somewhat similar to the Phoenix, I intended to make the Watcher a "hybrid" build and use the color palette of both the Survivors and the Monsters.

I will say that the Watcher was both my least favorite to build and to paint.  It's a very cool sculpt, and I wanted to do him justice, but I also felt hindered by some of the geometry, dangly lanterns, and the way the parts fit.

Build Notes:
I promised to keep this simple.
  • I used the Official Build guide.
  • I didn't install to the base immediately. I used my pinning tools to drill a small hole in his "feet" and did most of my painting with him glued to a paperclip for access to his underbits.
  • Some of the vines and lantern ropes needed some excessive trimming to make fit, but it all worked out.
  • I filled the seam between the front and back halves with Milliput before I installed the Head and ribbony pieces that wrap around. It would have been nigh impossible to fill if he was completely assembled.
Installing the ropes and lanterns. Take your time here. 

I used Milliput to fill the seam between the front and back, BEFORE the head and ribbons were installed.  In my infinite wisdom didn't take any pictures of it.  In consolation, here's an assembled but unprimed picture.

Priming and Shading:
The main idea is to treat the inside as being lit with lanterns (coloring the same as my Survivors) and the outside with ambient light and my "monster blue glow."
  • (Airbrush) Vallejo Surface Primer, Black
  • (Airbrush) ArmyPainter Necromancer Cloak (all over)
  • (Airbrush) INSIDE - 50/50 mix of AP Necromancer Cloak and AP Skeleton Bone
  • (Airbrush) INSIDE - AP Skeleton Bone
  • (Brush) Inside Lanterns - AP Phoenix Flames
  • Pin to base
  • (Hand Brush) BASE:  Vallejo Surface Primer, Black
  • (Airbrush) BASE and touchup:  AP Necromancer Cloak
  • (Airbrush) BASE:  AP Skeleton Bone
  • Use blue painter's masking tape to mask off exposed lanterns/ropes before proceeding.
  • (Airbrush) OUTSIDE - AP Uniform Gray
  • (Airbrush) OUTSIDE - AP Gorgun Hide, from behind the his right shoulder and almost straight down
  • (Hand Brush) Outside Lanterns - AP Gorgun Hide
  • (Wash) INSIDE - AP Soft Tone Ink, thinned 5:1 with water
  • (Wash) OUTSIDE - Reaper Black Wash, thinned 2:1 with water
  • (Dry Brush) INSIDE - AP Skeleton Bone, Matt White, Lava Orange, and Phoenix Flames
  • (Dry Brush) OUTSIDE - Gorgun Hide, Matt White, and Crystal Blue
  • Base:  (Wash)  Reaper Black Wash, thinned 4:3 with water
  • Base:  (Dry Brush)  AP Uniform Gray and Phoenix Flames
  • (Hand Brush) - Lantern highlights with AP Gorgun Hide and Skeleton Bone
  • (Hand Brush) - Darkened shadows with Reaper Black Wash
Mounted on a paperclip for access to the underside.

Building highlights on the underside.

I highlighted the hooded area, but somehow totally missed the injection peg sticking straight out of his head.  This was trimmed and blended with Vallejo Matt Varnish and re-primed before the cloak highlights were built.

Spots of AP Phoenix Flames added to hood and lanterns.

Same as above, photo looking up.

Carefully using some blue painter's tape to keep the cloak highlights off the lower lanterns.  Could have also used a business card or index card.

Building highlights. AP Uniform Gray - Back

AP Uniform Gray - Front.  Shoot mostly straight down to about 45 degrees from the table.

AP Gorgun Hide - Shot mostly straight down.

Reaper Black Wash applied to the upper cloak and AP Gorgun Hide applied to lanterns.

Dry brushing and glow colors applied. Harsh desk lamp.  I wasn't entirely happy with the shadows so I blended a little more wash into the recesses, dulled the orange, and lined out the lantern frames by hand.

Finished!

Finished - Back

Other members of the Core Box cast.

Watcher and GSK for a size comparison.

And with that, the KDM Core Box is completely assembled and painted.  Oh, there are still mountains of sprues in the box that I could work on, but plan to let them sit and get some more of our campaign under our belt before I break them out.

I'm super happy with the results, though I'm definitely up against the limits of this technique - the Phoenix and Watcher in particular would have benefited from a more traditional approach instead of this airbrush-wash-drybrush routine.  But I'll take what I learned here and apply it forward.  Thanks for reading.

Saturday, February 10, 2018

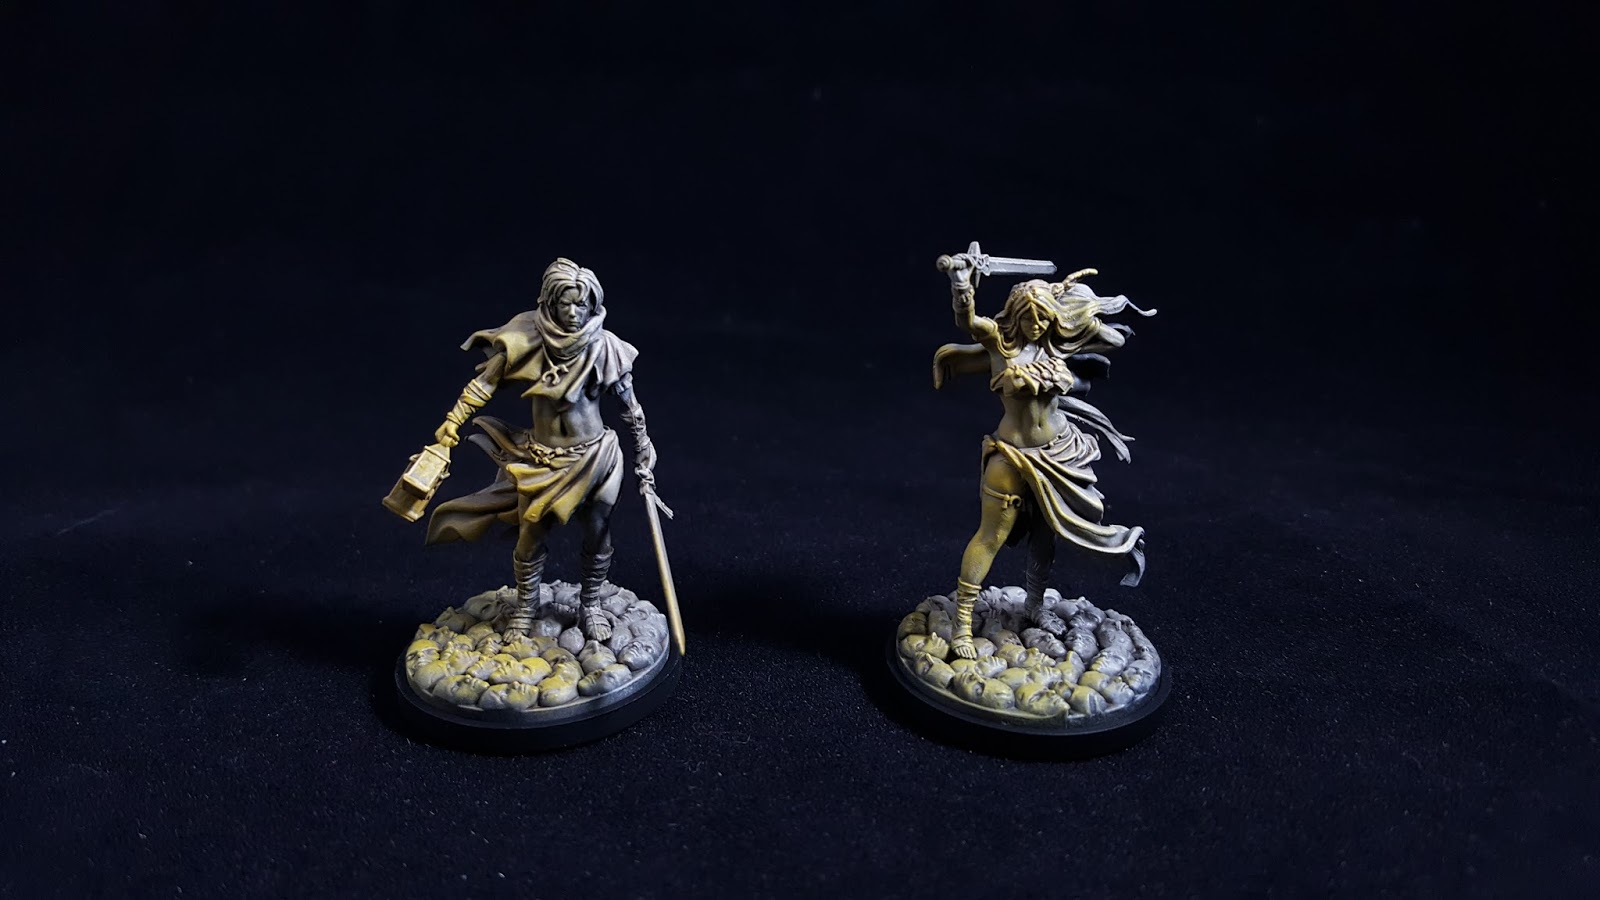
Hot off the Desk: KDM Intimacy Survivors

The last of the "core" KDM Survivors.

Aha, finally! The last of the 8 "core" survivors/heroes for Kingdom Death.  After this, there are ton of sprues for the armor sets, but I'm not assembling them right now.  January and February were slow months for my painting progress, but I finally (finally!) got these off the table to complete the series of 8 survivor figures.

I'm following a set of self-imposed color rules for my KDM set. If this is your first post in the series (see summary page), here's the part that I copy/paste:
-----
Color Choices:  For my KDM set, I'm using an airbrush to provide shadows in a pseudo-statue, almost monochrome paint scheme.  I want a lot of high contrast from light to dark, with near-black in the shadows and near-whites in the light.  I'm using warm colors (creamy grays, buttery whites, and a bright mustard yellow) for the SURVIVORS and cool colors (blue-grays and a neon blue) for the MONSTERS.
-----

Assembly Notes:
  • Overall, not as difficult as Young Rachel, but both of these figures have quite a few small parts.  I followed Vibrant Lantern (Male, Female), and referenced google images, as there are no official build notes.  
  • There are quite a few mold lines through smooth areas, especially on the legs. Be careful to remove them all.  Some of them are difficult to get to after other parts are installed. You've been warned.  :) :)
  • I used Vallejo Plastic Putty and Matt Varnish to fill gaps, working in layers.  These are small areas and these products worked well.  Just blend the edges with a wet brush or you'll get ponding marks.
    • Male Survivor:  During assembly, I ended up with some gaps in the Male Survivor's jerkin/tunic/thing and at the thighs where the Z-joint was showing.  
    • Female Survivor: Gap in her hair, and across her lower back, and a scratch in her butt from mold line removal (oops).  
    • As usual, I did the best I could with filling and then hit the figures with a coat of primer to see what was visible.  Then I did a 2nd pass with the varnish to clean up before continuing.
Painting:

I wasn't looking to break any new ground here, so I just followed the same recipe as the Starting Survivors and the Young and Old Survivors.  
  • (Airbrush) Vallejo Surface Primer, Black
  • (Hand Brush)  Vallejo Surface Primer, thinned a bit, touched up a few places that are hard to get with the airbrush
  • (Airbrush) ArmyPainter Necromancer Cloak, sweep the airbrush 90 degrees from vertical to parallel with the table.
  • (Airbrush) 50/50 mix of AP Necromancer Cloak and Skeleton Bone, sweep the airbrush from vertical to about 45 degrees with the table, highlighting areas that should be brighter
  • (Airbrush) AP Skeleton Bone, mostly straight down and a few highlights
  • (Hand Brush) AP Phoenix Flames on the lantern's glass
  • (Wash) AP Soft Tone Ink, thinned about 5:1 (5 drops ink, 1 drop distilled water)
  • (Dry Brush) AP Skeleton Bone
  • (Dry Brush) AP Phoenix Flames
But you came for the time-lapse airbrush pictures, so here you go!

Assembled models, front.

Assembled models, back.

Vallejo Surface Primer, Black.

AP Necromancer Cloak. I love this color.   Sweep from above the model to parallel with the table, never "up" under the clothes/arms.

50/50 AP Necromancer Cloak and Skeleton Bone.  Sweep from vertical to about 45 degrees from the table, then start giving brightness to where the lanterns will light.  (The female doesn't have her own lantern, I'm pretending she's standing next to someone).

AP Skeleton Bone has been shot from the airbrush and I'm basecoating the lanterns.

Wash applied.

Finished models, front. Dry brush with Skeleton Bone and Phoenix Flames.

Finished models, back.

Group shot. I did get a little brighter as I worked the series. Somewhat intentional; the starting survivors start in a much darker world.