 |
| Harsh Kitty. Mean kitty. Little ball of teeth. Angry kitty. Hungry kitty. Kill. Kill. Kill. |
I'm following a set of self-imposed color rules for my KDM set. If this is your first post in the series (see summary page), here's the part that I copy/paste:
-----
Color Choices: For my KDM set, I'm using an airbrush to provide shadows in a pseudo-statue, almost monochrome paint scheme. I want a lot of high contrast from light to dark, with near-black in the shadows and near-whites in the light. I'm using warm colors (creamy grays, buttery whites, and a bright mustard yellow) for the SURVIVORS and cool colors (blue-grays and a neon blue) for the MONSTERS.
-----
I actually bought 2 of these kits at Gencon - one to assemble FAST and get on the table, and a second for a future competition piece. This is the FAST version; as such I decided to use my old Kingdom Death recipes for colors and application.
It's pretty interesting to go back and try to replicate an old paint scheme. It's been quite awhile since I'd painted this scheme, and I was teaching myself to airbrush when I set out with the 1.5 Core Box. Since then, I've done dozens of other pieces and this fairly simple theme was kind of refreshing.
SURVIVORS
I didn't take many pictures of the survivors during assembly and paint. They went together easily and I used the old recipe for colors. One big difference: I went back with some Liquitex Yellow Orange Ink in the Sotar airbrush to punch up the yellow saturation. I also used Liquitex Burnt Umber to accent the shadows and add more brownish orange in the mid-range areas (i.e. areas of not full shadow).
 |
| Completed survivors: L-R Meatshield, Katnip, TastyTreat, and NotInTheFace. (They actually have names in the scenario; I'm being silly). |
 |
| Airbrush the base coat triad, wash, dry brush lightest triad color, dry brush yellow, then yellow ink. |
 |
| Off shoulder view. |
 |
| Comparison to one of the original survivors to see how close I got. |
GIGALION
I thought I was done with this guy at least 3 times but kept going back and tweaking.
 |
| All parts set out and ready to begin. Assembly is straightforward; no instructions required. |
 |
| Grrrr. |
 |
| Finished model, mocked up on the base. |
 |
| Base only. |
 |
| Applying base coats. Here I'm putting down Reaper Carbon Gray, which has replaced AP Necromancer Cloak on my bench. |
 |
| Base coats applied. Reaper Carbon Gray, AP Uniform Gray, AP Gorgon Hide. |
 |
| Using Liquitex Inks in the Sotar to color in the base. I'm trying to get him to pop out from the background. |
 |
| Reaper Black Wash applied, thinned 1:1 with water. I touched up some of the inks after this step. |
 |
| AP Gorgun Hide and AP Crystal Blue dry brushed on the lion. I also went back with Liquitex Titanium White in the Sotar to pump up the contrast on his arms. |
 |
| Dry brushing some of the base details; random grass green and yellow bug. I didn't want to paint these by hand as I wanted them less "crisp" and part of the background. |
 |
| Reverse view, same step. |
 |
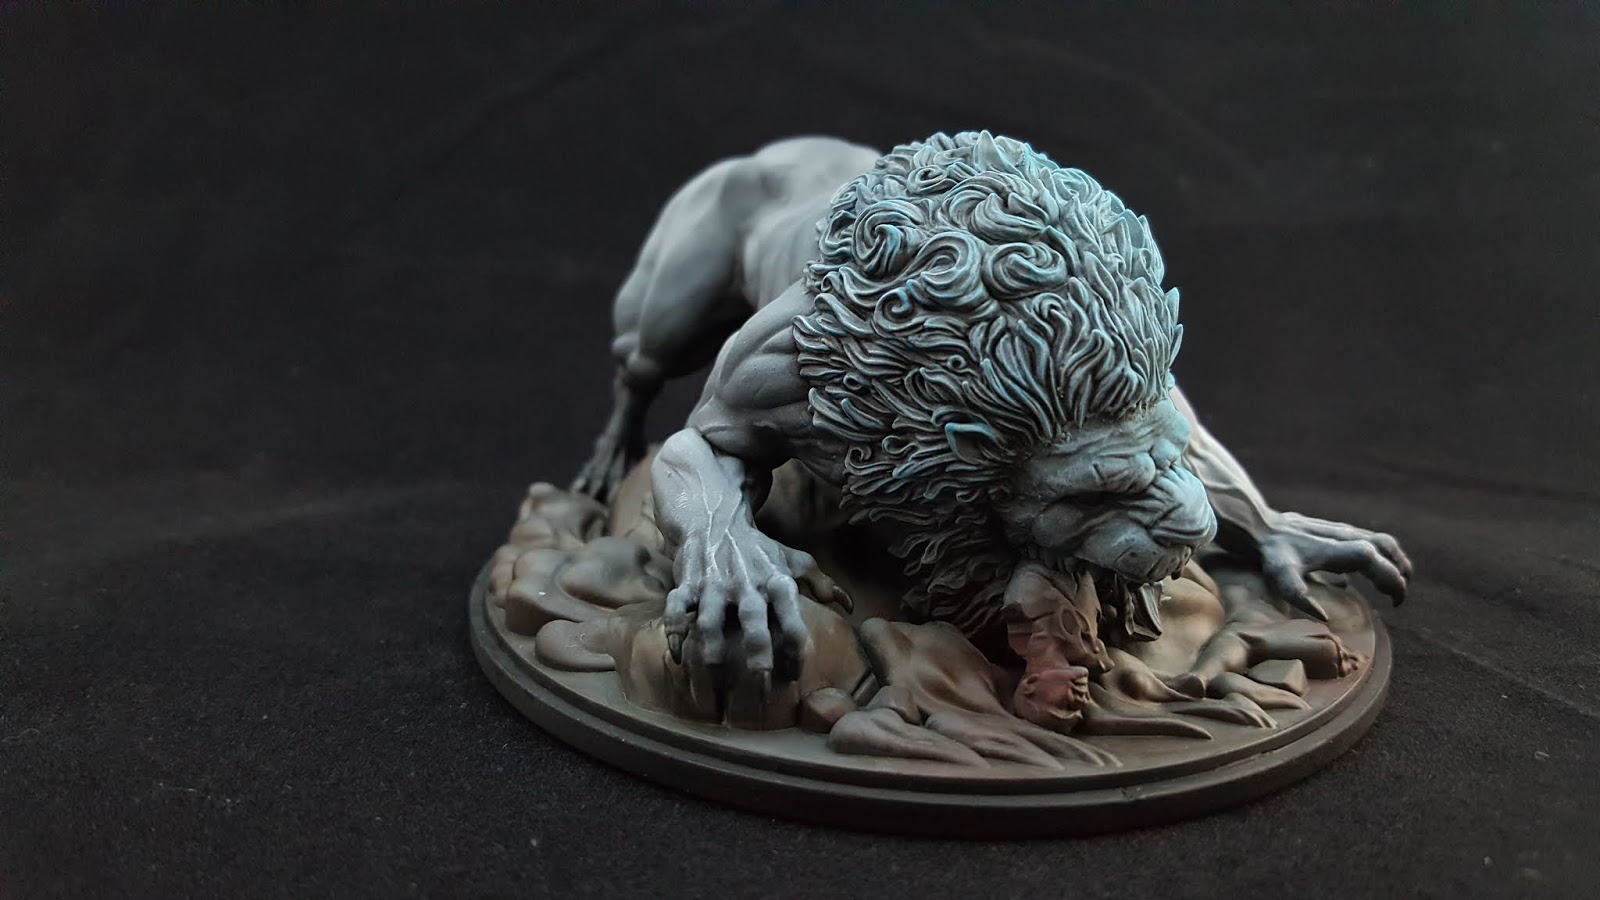
| Rawr. I thought I was done here, but ended up continuing to tweak. |
 |
| Final form. Painted the claws and eyes with Reaper Adamantium Black. Did more airbrush shading of the stone face with Liquitex Burnt Sienna and Burnt Umber to shift the color away from his body color. |
 |
| Used Liquitex Carbon Black to put more shadow under his ribcage and rear legs. |
 |
| Rear view. |
 |
| Off quarter view. |
 |
| Reverse view. I had to laugh as the nasty gap in his ankle actually matches the nasty gap in my normal White Lion. |
No comments:
Post a Comment