Saturday, January 19, 2019

To Continue?


Had a friend ask me this week if I was going to continue on with this blog. 

The honest answer is, I really don't know.  I've never caught a real groove, never built a readership, and honestly this platform is a dinosaur in the era of Discord, Youtube, Twitter, and Instagram. 

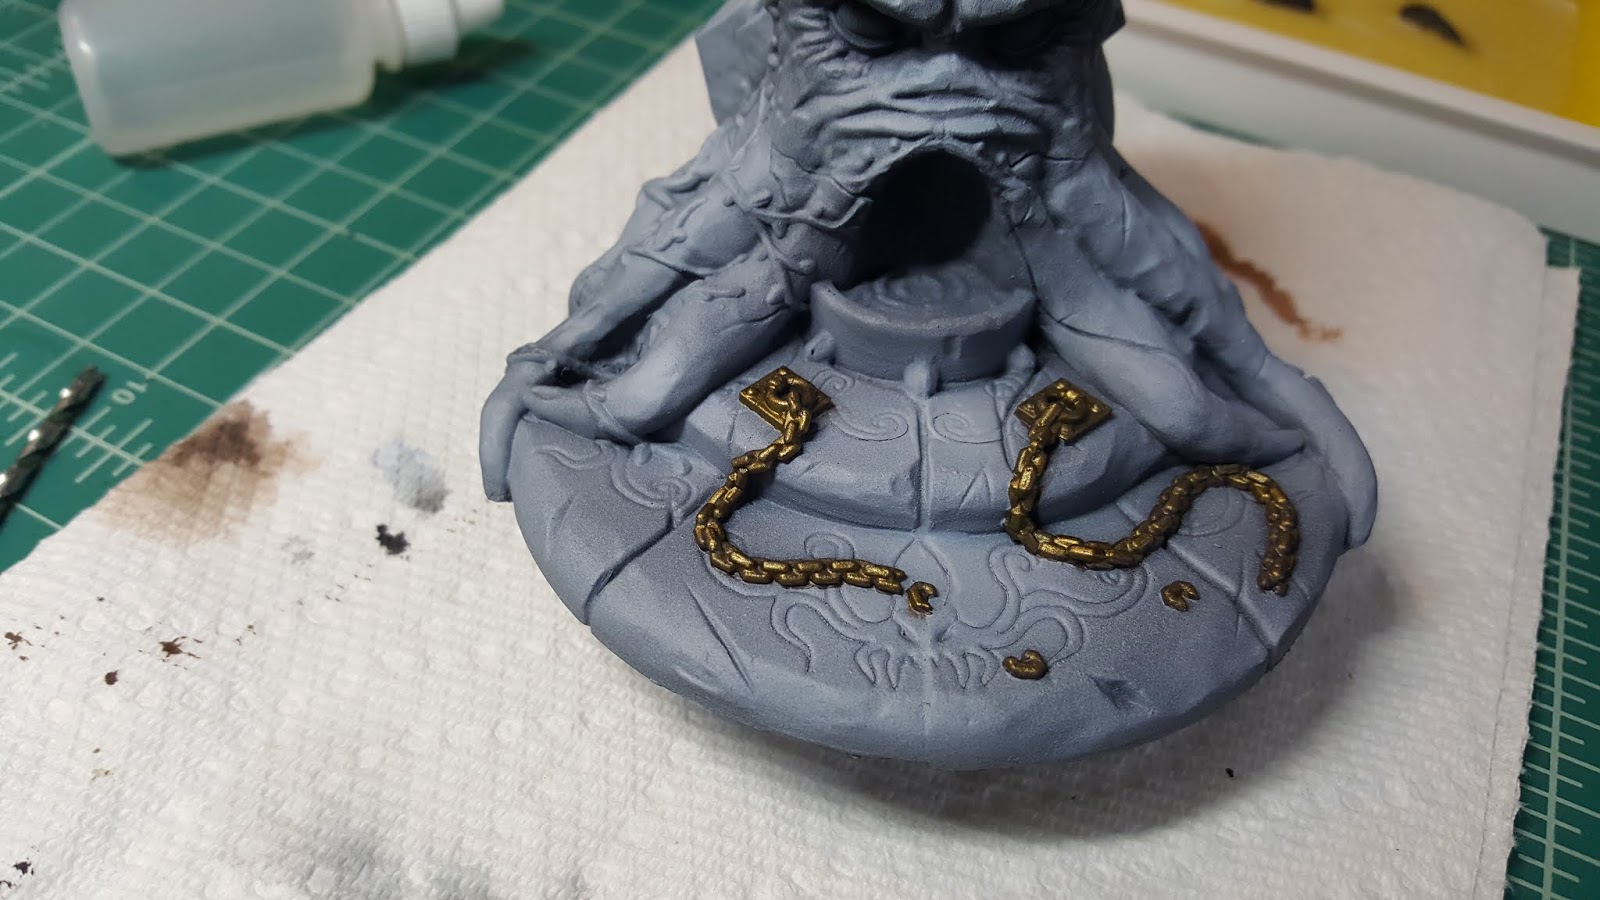
My posting volume is down, in part, because my painting volume is down.  Sounds silly - it's the winter - but I've been struggling with absurd amounts of apathy towards some projects that I feel like I SHOULD complete and NEED TO complete while other more alluring projects sit and gather dust.

Case in point:  I'm sitting here typing on a Saturday morning instead of turning on my bench light. 

Secondly, I know that there's basically nobody reading this.  Since you, the reader, are reading this now, I'll just salute and say thank you.  But please know that you're one of the few. 

My Kingdom Death posts still get some hits, and I take some pleasure in that; hopefully I'm helping people.  But other posts about Shadows of Brimstone, GenCon, or other rambles simply don't get much traction.  My most recent post - 6 days ago - has just 1 (one!) hit.  And that might have been me. 

When I link directly (to BGG or another forum), I get a burp of activity on that one post, people complement me on the blog, and then the wave passes in a day or two.  So, when people are finding the blog, they aren't staying, they aren't following, and probably don't come back.  This doesn't mean I'm "blaming" them; it's more of a confirmation to me that a blog like this isn't in their daily read routine (see previous statement about this platform being a dinosaur).

True story: I get more traffic from Russian porn sites than real readers.  Maybe they have a mini fetish, I dunno.

This doesn't feel like the end.  But it might be a transition. 

Sunday, January 13, 2019

Hot off the Desk: Shadows of Brimstone Corpse Pile

Finished product. Super fast, nothing too fancy.

So, last night I was rummaging around in an old Amazon box that I've repurposed for nerd storage.  I happened across the SoB plastic Corpse Pile package that I bought ... sometime? One of those things that you forgot you had.

Anyway, these pieces replace cardboard tokens that come with the Swamps of Death core box; they're basically terrain pieces that spawn zombies.

I stared at the package for a few minutes, then reached over and turned on the compressor.  These guys were getting some paint!

Total time investment is maybe 45 minutes.  Nothing too fancy.  I've seen guys spend the effort to detail all the individual bodies, paint the clothes, boots, and bits.  But there's a fair amount of smearing between distinct details; I think that a more abstract approach probably works better.  I also wanted to test some speed-painting techniques combining a few of my prior methods.

Steps 1 and 2: Stynlrez primer, followed by AP Necrotic Flesh at a 45 degree angle.

I mounted each CP to a cork and used my proprietary cork holder (aka 2x4 with holes in it) to hold them while drying.  The Stynlrez went down smoothly, and I left them overnight to dry.

First thing this morning, I hit them with some color.  ArmyPainter Necrotic Flesh is a perfect color for undead baddies.  I used the Sotar 2020 and mixed the paint fairly thin.  I held the airbrush about 45 degrees above the table and gave them a quick zenithal treatment.  This took maybe 5 minutes, including the time to mix paint and clean the airbrush, then it was time for breakfast.

Step 3:  AP Strong Tone ink applied.

Mid-morning I came back and found my bottle of AP Strong Tone ink, which is a deep brown. 

Added a few drops into a 1oz solo cup, and added a few drops of airbrush thinner (this was more for my ability to brush the result than to reduce its intensity), call it 6:1 or 6:2.  Apply the wash liberally all over, then go back and wipe away any bubbles.  Also look for areas that have pooled; wipe your brush on a paper towel and blot those away.

Walk away and let that dry.


Step 4:  dry brushing: AP Necrotic Flesh and Fang Bone.  Harsh booth light.

Late morning I came back late morning and picked up the dry brush - more Necrotic Flesh and some AP Fang Bone white to bring out some details.

Finally, I fired up the Sotar again and hit the edges with Burnt Umber all around, followed by Burnt Sienna in the brighter area (Sienna is more 'orange').  FW Payne's Gray ink (also via the Sotar) reinforced some shadows that I lost.  I did a correction pass with the dry brush and again with more Payne's gray and called it done.


Step 5:  Airbrushed inks and adjustments.  Softer bench light shown here.  Airbrushed inks (Liquitex Burnt Umber and Burnt Sienna) give the lower edges some definition and color interest.  I also (very) carefully added some shadows with FW Payne's Gray, mostly to the back side but also in the front side on a few places.
This last session was maybe half an hour total, so I think I knocked these out in about 45 minutes total time.  I may go back and put some neon green in some eye sockets, but will sleep on that.

Tuesday, January 1, 2019

Hot off the Desk: Shadows of Brimstone Dark Altar

Brimstone Dark Altar

This is the Shadows of Brimstone Dark Altar, which was originally available at GenCon 2018 and subsequently available on the FlyingFrog web store.  He's a cool terrain piece, and seemed pretty straightforward, so I bumped him up the line and got him straight into the paint booth.

This isn't intended as a detailed how-to, but I'll try to walk through the process with pictures.

Typical start - Stynlrez black primer.  I have him attached to a large pill bottle lid with some blue-tac.  Right here there's no highlighting added, it's just the reflection of the harsh booth light.

Chains basecoated (wet blended) with Scale75 Necro Gold and ArmyPainter Dark Stone.  I've really loved the S75 golds I've used, and the Necro pairs perfectly with the Dark Stone.

Wider shot showing the overall progress. The blue-gray was a 3-color build up of AP Necromancer Cloak, Uniform Gray, and Gorgun Hide.  This is the same color stack I used for my Kingdom Death bad guys.

Reverse shot. I was going for a lot of stark contrast from light areas to dark.

The vines were basecoated with AP Brown Stone and Oak Brown.  Then, I gave the entire "octopus head" a coat of Reaper Black Wash (thinned a bit), and here I'm showing the base, which I washed with AP Strong Tone. 

At this point, I got the Sotar2020 out and very lightly re-applied highlights in Gorgun Hide.  I didn't take a picture, but I also hit the lips of the steps with AP Skeleton Bone (also with the Sotar).  I also started shooting a few inks to push the recesses - Liquitex Carbon Black and Burnt Umber.

Applying pre-shading to the rocks in the back. I wanted these to be glowing Darkstone and lit from beneath. 
I really fussed with the rocks, working back and forth with hand-brushing, airbrush, airbrushed inks (AP Purple), and paints.  Very trial and error.


Almost done. Here you can see the weathering I've applied with inks. The chains have been re-highlighted with S75 Dwarven Gold.  The glowing rocks are about done.

Rocks, done. Not as 'glowy' as I intended, but I wanted the octo-face to be the brightest spot on the model.

Ultimately, the trick with the rocks was to really provide a strong outline with some hand-brushed edge highlights and some careful application of AP Strong Tone.

Finished model, side. Before applying the eye glow, I spent some time applying highlights by hand to his warts, veins, and wrinkles.

First time using blood FX.  Perhaps overkill but wanted to indicate recent use.

Finished Model. 

 If I were using this as a contest piece, I would have omitted the eye glow or done something different.  Comparing this picture with the ones above, the un-glowed verions are perhaps more "pleasing" but wanted to convey how evil this place was.  That chewing-on-tinfoil mental gnashing your brain is doing is somewhat intentional.

Like any project, I learned a few things, screwed a few things up, and would do a few things differently.  I was really happy with how the Liquitex Burnt Umber and AP Purple ink combined to make a really pleasing golden brown.  I liked the amount of contrast, shading, and weathering I did (though I really could have gone crazy with some water drips and runs).  The eye glow - despite the color - was really easy to do and is a technique I'll apply to gems, engines, and other glowy things down the road.