Sunday, July 29, 2018

Hot off the Desk: Dropfleet Commander UCM Frigates and Corvettes

UCM Santiago Corvettes on patrol. 

Quick post, mostly pictures.  Although I'm not fighting for UCM at Gencon this year, I'm still pressing at "best possible speed" through the rest of the project.  This morning I managed to clear up some real estate on the bench by getting all the UCM Frigates and Corvettes mounted on their pegs.  The capital ships (Crusiers, Battlecruisers, and Battleships) are also now well on their way, but that's a post for another day.

I'm pretty happy with how they came out; will thank Aaron Lovejoy at Miniature Monthly for pressing me to push my own boundaries in terms of process and color selection.  When I set out, I didn't expect to do any masking/striping of the hulls, and the (limited) weathering and engine smut that I did was also unplanned.

Once I'd done the test cruiser, it was apparent that masking and striping these hulls was entirely do-able, and actually gave some flavor of the "dazzle" camouflage schemes tried by the major navies when my grandpa was a kid.  (Although it seemed like a great idea, it was perhaps the most time consuming part of the painting process....).

By the numbers, this is well over half my fleet (11 hulls total) but by total surface it's not even close to half.

I'm not quite happy with these pictures, but they're not bad for a Sunday afternoon after I've had a double rye....  :)

Santiago: Top view.  The Reaper Misty Gray tips were painted by hand, the Reaper Rusty Red stripe was masked and airbrushed.

Reverse view.  Engine smut was applied with the Sotar 2020 airbrush.

UCM Jakarta missile frigate.  These guys were real jerks to stripe because of the launchers, so I punted and striped the bridge structure.  I liked it so well I went back and painted the other bridge structures the same way.

Jakarta front, UCM New Orleans class dropships rear.

Jakarta and New Orleans rear view.

Four UCM Toulon class gunboats. 
UCM Toulon front view.


UCM Toulon - Side view.

UCM Toulon - Rear 3/4 view.

UCM Toulon - top view.

Saturday, July 28, 2018

ZPS - July 2018

July was all about Dropfleet

I'm going to break tradition and go rogue for this month's formatting.  Instead of the 4 normal categories of things rising and falling in priority, let's just ramble a little bit.  I know you'll miss the bullet points; they shall return next month.  There are basically three topics I wanted to tackle.  Gencon, Dropfleet, and more Gencon.

I. Gencon and a Retrospective.

Gencon is in a few days.  That's a good thing; I could use the time away from the office, and am very much looking forward to seeing old friends and walking the convention floor.  I'll be glad to visit some of my favorite booths and chat with people that I've developed online conversations with.  And I'm excited to be in the same room as one of my favorite authors - James S.A. Corey.

Gencon also marks the first anniversary of this blog, at least in concept if not by posting date.  There were things I wanted to write about coming out of last year's event, and this venue became the repository for those things.

It's been a good year.  Sometimes it feels like I'm overwhelmingly behind the curve in terms of project progress.  I mean, I'm just now getting to DFC (figures I bought last August).  But in terms of personal/hobby growth, it's been a big year.  I've typed about this before, but model prep (filling, moldline removal, priming) and airbrushing shading are the two biggest things I've added to my toolkit and now take for granted.  I'm still learning blending and brush control, and am looking for ways to expand how I do detail work with the airbrush.  But there are some big game-changing things I hadn't attempted - and was afraid of - this time last year.

Good, but not quite good enough.  Watch for improvements.
II. Dropfleet Commander.

As the Kenny Rogers classic says, "you have to know when to hold them, know when to walk away, and know when to run."

The big Dropfleet push (GC Project #2) started strong, and as the month started I had a really good feeling about it.  The test piece (shown above) looked great, model assembly went well (except for the Battlecruiser) and I was about to pop my knuckles, roll my neck, and crank out a lot of little ships.

But weekend before last, I hit a point where I was mapping out the remaining work against remaining days and coming up short.  Shortly after, I realized I was starting to make trades in quality for the sake of schedule.  "Oh, I'll just skip this, it'll look okay."  Ack, not the situation I wanted to be in.

I have a ton of money wrapped up in the DFC fleet.  I really didn't want to drop back and punt (whoa! Zoxe used a sports metaphor!) but I really didn't want to be unhappy with the result.  The direction I was going was perhaps "above average" in terms of DFC ships I see on google search results, but I knew that I was capable of better.  And as I said, I was looking for shortcuts that were becoming too tempting.

The voice in my head said that I should drop out of my DFC event at Gencon but it took a few days for me to say it out loud.  But, once I admitted it, it gave me the creative freedom to go back through the ships I thought were "done" and do some additional work, fixing things and pulling out details that I'd otherwise have overlooked.  It's also allowing me to take some risks and develop some additional skills instead of just assembly-lining them through.  Are they pro-level?  Oh, heck no.  But I'm far happier with the results I'm seeing.


Get Ready.

III. Getting Ready for Gencon.

There are a lot of google results for "how to Gencon" so I won't replicate that level of detail here.  Sure, the event is an unwieldy beast, and we certainly have our own recipe, but there's really no "wrong" way to do the event.  Instead, I'll share a few personal steps:

  1. Take your vitamins.  'Con Crud is an illness that's real.  Between all the unwashed masses you'll be rubbing against, late nights, crappy diet, and various forms of nerd stress it's easy to compromise your immune system.  I think I've been sick after at least the last 2 of 3 Gencons.  This year, even though we drive, I'm treating it like one of my work trips to the airport:  multivitamins and extra sleep in the days prior, and vitamin C throughout.  (I'm not a doctor and this is not medical advice, just do what makes sense for you).
  2. Stay hydrated.  We bring water with us each day and buy more there.  This is a little crude, but if you haven't had to pee in awhile, ask yourself why.
  3. Don't eat the food in the convention center.  We bring healthy snacks to grab throughout the day.  When it comes time to find an actual meal we go to the food trucks - there will be two areas where they congregate and they'll rotate each day.  I can't say that the food trucks are any cleaner than the convention center, but the food can be lighter (less "cafeteria-ey"), tastes better, and getting some fresh air won't hurt you (really).
  4. Make dinner reservations.  Preferably somewhere outside the radius where the nerd hordes will pillage.  Sit down, have a real dinner and an adult beverage or two with friends.  You might be thinking you need to be rolling dice 23 hours a day, but just stop and pause and enjoy the weekend for what it is: time with people like you.  Indy is a great city that supports the 'con like few other places, step outside and enjoy it.

Sunday, July 8, 2018

WIP: Dropfleet Commander Battlefleet and Battlecruisers

I'll cut to the chase:  The past week has been pretty busy in the Zoxe Shipyards.  I've worked through all the basic assembly for my intended fleet list, plus a few alternates should I decide to change the list around between now and Gencon.  I've primed the ships that I assembled earlier this year, and partially painted a test cruiser to confirm colors and process.

Test piece: airbrushed cruiser, accent panels, and accent stripe.  More detailing will follow, but this cruiser established the processed for the other large ships.  I'll do a separate how-to post later, but wanted to share the WIP.

Battlecruiser parts, dumped straight out of the bag and assembled.  Only one of the hull sections in the left (lower and center) are used, depending which primary weapon type you choose.

Ugh. The Battlecruiser aft hull section had some monstrous flash and goop that apparently blew out one side of the mold.  Look at the tip of my knife and note how goopy  the model is.

Reverse view showing thee correct geometry.

The Battlecruiser gave me some issues.  Strictly speaking, I don't need it for my list (I'll likely run a Battleship instead).  I went ahead with assembly thinking "oh, there are only a few parts, it won't take long."

WRONG!  Two hours of fussing with a series of issues - some of them self induced, but many of them production issues. 

The biggest problem was that after trimming, the forward/top hull section didn't want to align straightly.  I glued and then broke the joint apart twice because I wasn't happy with the alignment.  By the third attempt, the amount of residual glue was crudding up the joint.  I ended up scraping it clean and then actually removed the molded-in locator tabs.  Then I used a paperclip to pin the joint.  More hassle than I expected, but it's probably stronger this way anyway.


I hadn't intended to pin the joint between the upper-fwd hull and the aft hull, but it just wouldn't align cleanly with the factory-molded alignment tabs and slots.

Finished battlecruiser.  Wider gap than I'd hoped, but it'll fill with a little bit of Vallejo Plastic Putty after I apply primer.

Here are all the ships I've assembled in the past 7 days.

The entire fleet, including the ones I already have in primer.  Test piece is in the lower left.  Test frigate is on the middle left, but will be repainted entirely.

Test cruiser, side view.

Test cruiser, side view.

Test cruiser, top view (repeat image).

From here, I need to mount all of the ships to corks, and get them in primer.  I've got just under a month to get everything through the paint booth and apply finishing touches, but I think I can get there.


Saturday, July 7, 2018

Unboxing: Dropfleet Commander UCM Battlefleet Box

Another quick unboxing. I took these pictures a few days ago; as of last night I'm up to my elbows in sprues.

For those unfamiliar, the Battlefleet Box is a package deal containing oodles of ships.  They were premiered at GenCon 2017 (we obtained the very first to be available anywhere) and I'm only now removing the shrink wrap. 

This UCM Fleet Box contains:
  • 1x Johannesburg or Perth class Battlecruiser
  • 6x UCM Cruisers
  • 8x UCM Frigates
  • 3x Santiago Class Corvettes
  • 1x Command Cards
  • 1x Activation Cards
Said another way:  the BF box is basically DOUBLE what you get in the starter fleet, PLUS 3x Corvettes and 1x Battlecruiser, but MINUS the core rulebook, tokens, map, dice, and tape measure.  Paired with a starter box (or in our case a 2 player battle box), it's a great way to build out a mid/high point Fleet vs. buying everything separately.


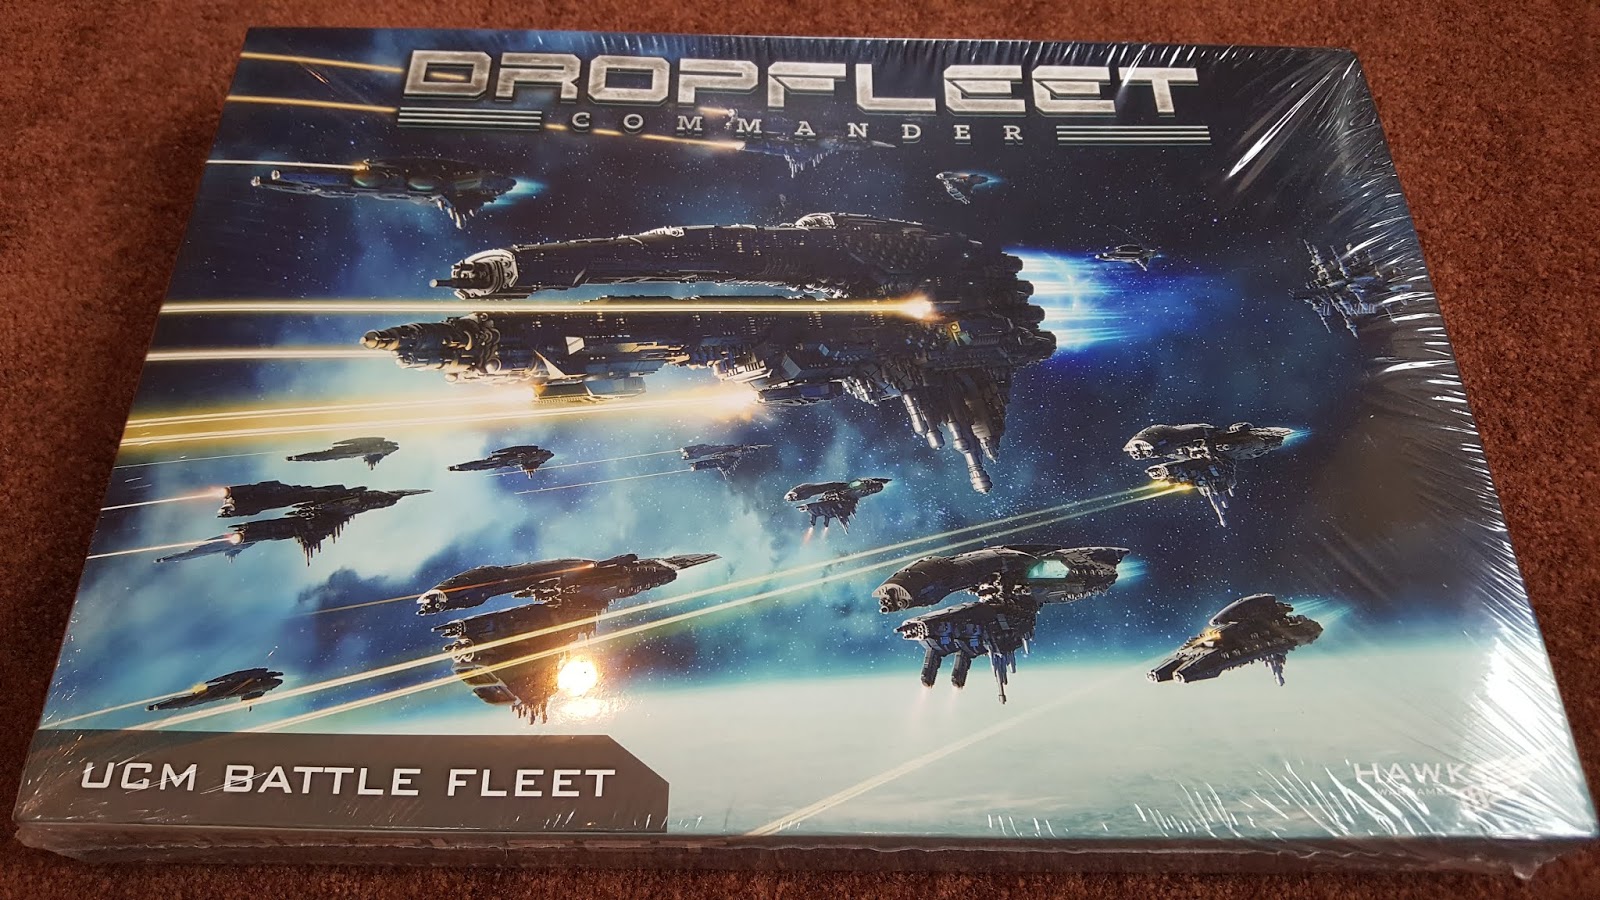
Box Front, Shrink Wrap still intact.

Box Back, with some possible builds.  The Battlecruiser, Cruiser, and Frigate hulls are modular allowing the builder to choose the exact role/stats desired.

Box OPEN.  The stack of sprues on the left and right are the same:  1x Frigate and 3x Cruiser per side.  Center Top are the bags for the Battlecruiser, and a separate bag for the 3x Corvettes.  Bottom center are the Activation and Command cards.

A quick break for some bullet points.  Bullet points are cool.
  • Each UCM Frigate sprue can build up to 4x Frigates, but only 2x of any single type.
  • Each Cruiser sprue can build just 1 Cruiser of any configuration.
  • The Bag of Corvettes (which is a fun thing to type) contains 3 hulls, no assembly required (just trimming).
  • The Battlecruiser comes in several pieces and requires assembly.
  • Cruiser and Frigate sprues are plastic (Zoxe recommends Tamiya Cement for assembly).
  • The Battlecruiser is resin and will require superglue.
  • The Corvettes are also resin but require no assembly.
  • All of my sprues looked great, though one Corvette had a void in the center of the hull.  I filled it with Vallejo plastic putty; if I were building for a contest I'd need to complain and seek replacement as I did lose some minor details.
  • I didn't take pictures of the individual Cruiser and Frigate sprues.  They're identical to the ones previously shown HERE.
Anyway, more pictures....

Stickers for the bases, clear posts for the bases, and quick reference stat cards and assembly sheets for Cruisers and Frigates.  The Stat cards and Assembly sheets are the same as what comes in the 2p Battle Box.

Battlecruiser and Corvette bags.

Santiago class Corvettes come fully assembled in resin. Shown here untrimmed straight from the bag.

SPRUES!!! GLORIOUS SPRUES!  Ahhh, I love the smell of Tamiya Thin Cement in the morning.

Wednesday, July 4, 2018

Unboxing: Dropfleet Commander UCM Battleship

Assembled ships:  UCM New York top, UCM Beijing bottom

I feel like I've been neglecting the blog the past couple of months since most of what I'm doing I'm (for GenCon) not posting about.  Here's a quick post while I'm enjoying my morning coffee.

DropFleet has had a tough year.  I'm no expert on Hawk Wargames, but the gist of it is that after the DFC Kickstarter, the company struggled to make the transition from fulfillment and back to regular operations.  That meant that Dropzone Commander (their original ground-based skirmish game) as well as DFC got somewhat neglected.  Store shelves were empty, and planned product releases (including the Battlefleet Boxes that we bought last year at GenCon) were delayed and deferred.  TTCombat bought the line and is doing their best, but progress has been slow.

All that to say this:  it's been hard to find DFC stuff at times; items randomly go out off stock and there's few details on restocking. 

So, several months back, I noticed that the Scourge and UCM Battleships were restocked at the TTCombat Web Store.  It's based in the U.K., but I had to have them and put an order in.  Despite best of intentions, they remained in the blister packs until yesterday.  (Note:  They're still hard to find in the U.S., so my delay really didn't cost me much.)

With that out of the way, here are some pics:

I was somewhat surprised to see how they were packaged. When they say blister packs, they MEAN blister packs.

Package contents.  Model, stand, stickers for the stand.  There are bits (nose and guns) to make one of three configurations depending upon your mission.

I set out to assemble the New York class first (carrier variant) but found a molding error on the NY's nose piece in the first blister.  Here I'm showing the difference between the two blister's contents.  Note the missing geometry where my finger is pointing.

Another shot of the low-fill NY nose.  Since I wasn't intending to build two NY variants, I was actually ok (the Beijing uses the other nose provided), but I did notify TTCombat of the error and got a fast and friendly response.
Here the Beijing is partially trimmed and almost ready for assembly.

A few assembly notes:

  1. No assembly instructions are included but they are available online.
  2. This kit is entirely resin, so you're using superglue and NOT (not!) plastic cement.
  3. Mold detail was very good and the resin is more rubbery and not as hard and brittle as other companies' material (*cough*FlyingFrog*cough*).  It was easy to clip with a sharp set of cutters or carve with a sharp hobby knife.
  4. Assembly was straightforward but NOT as easy as I'd hoped.  After assembling the plastic models several months ago, I was expecting very little trimming, but was surprised/disappointed to find that almost every piece needed some adjustment, in particular all the little antennae that run along the bottom/keel of the ship.


Tuesday, July 3, 2018

ZPS - June 2018


Caldari from EVE Online: Painting inspiration for Dropfleet Commander.

It's hot, humid, and the bugs bombard me whenever I step out the front door.  Spring must be over and it's gotta be summer! 

1. On the Table:

  • GenCon Project #1 - I had high hopes of getting project GC1 done by mid-June, but it wasn't meant to be.  Between the Ikea Hellquest and a gazillion little things that needed doing before my annual family BBQ, I lost at least 2 if not 3 weeks of progress.  But, I've recovered and actually put the last adjustments on the final figure last night.  As soon as I post this, I'll put her on her base and I'll call this one done.
  • Dropfleet Commander - Finally, finally, I'm going to shoot some primer on the first ships today or tomorrow for GenCon Project #2 (GC2).  I'm prepping for an event at GenCon, so I have a lot of work cut out ahead of me.  But I've come up with a reasonable Fleet List that won't cause me to build (that) many more ships.  Since this project isn't cloaked in secrecy, I'll be able to share some pictures as I go.
  • Convention Planning - GenCon's events are planned and in the pipe.   PAX unplugged tickets are bought and the hotel is reserved.  ReaperCon tickets are bought, hotel reserved, and event tickets purchased.  Phew.  

2. Gaining Momentum:

  • GenCon Project #3 - I don't have much hope of finishing this one but I might be able to squeak it out.  
  • KDM Expansions - They're still in the box, but if I can knock out all the GC stuff, assembly of the Legacy Expansions will finally begin.
  • Guild Wars 2 - It's stupid humid (heat advisories most days this week), so I've been hiding inside enjoying some PC games for a change.  I enjoy the vanilla game most, so I rolled a new Elementalist and have been working across the map.  I'd never played a Double Dagger Ele before, and have been having a blast (pun intended) with her.

3. Losing Traction:

  • Gloomhaven - Not by choice.  Need to get the campaign back out and continue to play.  I'll need to hotseat some Dropfleet before GenCon, so I'm not sure we'll have the time or space to make progress.

4. Going, going, gone.

  • Biking - I haven't been on the bicycle since last May.  Have been getting the itch lately (I do miss it) but my timing and the weather couldn't be much worse.  

Saturday, June 30, 2018

Summer Sprint

GenCon badges came in the mail this week.  That's the point that August starts to feel very real.  It looks like it's going to sell out again, so I'd expect to be welcomed by this sign.

GenCon2017 greeting.  Expect it again this year.

Work was threatening to send me on business travel the week of GenCon.  I was keeping my head down and not reacting to the not-formally-announced trip, but was prepared to throw down an approved vacation slip from months and months ago and practice my best "are you kidding me?" look.  As it turns out, that trip got deferred to mid-August and the showdown was averted.

Anyway, I'm very much still in the middle of GenCon prep.  I have a few days off over the July 4th Holiday and am hoping to get the long-awaited project #1 (aka GC1) completed this weekend, then move strongly into the DropFleet Army prep for my battle at GenCon.  There is so much to do, and I paint so slowly....

But after a slow early June, I've accelerated and there is still hope.  As I was painting this week, I realized that my methods have really changed over the past year.  I've written about this before, but I happened to stumble across some Shadows of Brimstone minis that I finished just before GenCon last year, but never based and thus never declared "complete."  They're okay - certainly tabletop quality - but I kind of rolled my eyes and sighed.

I can't convey how much Miniature Monthly has changed the way that I look at the process.  

I'm nowhere near a master.  That takes practice and probably more innate talent than I have.  And I'm still using a mix of styles and methods.  For example, I don't like using a wet palette, which is heresy.  Some of the things I'm doing actually cost me time in the long run, but end up being lower risk by adding steps.  (I can jump in with both feet and risk completely ruining a model, or I can sneak up on the finish I want).  

But on the current-unnamed-project, I'm using the Airbrush to prime, basecoat, and provide initial highlights.  That's not something I was doing a year ago, but got comfortable with through KDM.  New to this project: using a Sotar 2020 airbrush to shoot inks and washes for shading.  Before the Miniature Monthly boot camp, that would have been unthinkable.

Last night I was using 2-brush blending to add a colored wash into the shadows of my current figure.  One brush to slide the wash into place, another damp/clean brush to erase the seam between colors.  Super simple, but not something I knew about until earlier this year.  I experimented with it on the KDM Watcher, and am using it full-force in the current GC1 project.

My task this afternoon is to work on the face of one of the female models.  I hate painting skin.  But I now have a decent understanding of the tools and theories I need to employ.  (That doesn't mean it'll look great, but it does mean I've got a better chance at success than I did before....).

Back to these guys ... soon. Very soon.


This is all Miniature Monthly.  Recently, I upped my tier to the top level.  This gives me a monthly 1:1 session with Aaron Lovejoy.  It's expensive and I won't keep it very long, but I needed to jump start the Dropfleet project, and he had an opening.  We did our first session last week; about an hour with him on Google Hangouts talking through the project and watching him doodle in photoshop changed reinforced some things I was already planning and changed the way I was thinking about the fine details.  An hour with him saved me hours of fussing and cussing and will speed up the entire project.  

I just need to get GC1 out of the way and shift gears to it.

Thursday, June 21, 2018

Unboxing: Triplanetary


So, in general, I'm a fan of Steve Jackson Games.  I love sci fi games and space-based combat.  And of course I'm a Kickstarter junkie.

Triplanetary checked all three of these boxes, so I was in!  Triplanetary is a game that was first released in 1973, and last reprinted in 1981.  Through Kickstarter, SJG brought this title back to life, which I think is pretty cool.

This was a low stress campaign with zero additional stretch goals or other shenanigans.  Pledge. Wait. Get game.  Simple simple.

Anyway, here's the grand unboxing.

The game box - Front.

The game box - Back.

Box top open.  Oooooh, I love that smell.  The instruction booklet is nicely printed and illustrated but is thinner than "modern" sprawling epics like Gloomhaven or KDM. 

The game board comes in two pieces. At first I thought these were to separate mission maps but they actually join together.

Game board laid out with the game box for scale.

Most of the box is actually empty space.  There's the game board and a single sheet of punch-out tokens - no minis, meeples, or standees (although it's probably begging for some 'borrowed' ships from X-wing or Armada).  There are a pair of dry erase markers to record ship movement (the manual provides a method of shorthand to encode past moves).  And a single d6.  ... that's pretty much it!  

I'm actually impressed that the game was reprinted intact - the temptation to pimp out the box and "Kickstarterize" the reprint with minis, addons, and stretch goals.  But I think they made the right call and kept the price down.

The neat part about the game is going to be the vector-based movement and fuel management.  Simple, elegant rules where ships maintain their inertia between turns and fuel points are spent to change direction - sort of like Classic Asteroids on the old Atari 2600.

Will be fun to hotseat a game on a rainy Saturday soon.

Sunday, June 17, 2018

Ikea Hellquest

I'm currently on a quest to overhaul our gaming alcove.  We have a family gathering in a couple of weeks, and I need to free up space and make things tidy before our 3- and 4-year old nieces descend upon our abode.  So, I've spent the past two Sunday afternoons assembling our new Besta chest/organizerThis is not as exciting as it sounds!

Ikea Besta modular package from the product catalog wonderland.

Background:  Besta is a modular line at Ikea that lets you customize the result. It's primarily intended for TV/entertainment centers but we found a pre-config'd setup that will fit our gaming alcove perfectly and allow us to centralize all the various boxes and unassembled models that we have stashed around the house.

Hellquest, Chapter 1:  The older I get, the more I loathe box stores.  We've known for awhile that the gaming alcove needed some storage options but I was reluctant to buy based only on the online catalog and theoretical dimensions.  A few weeks ago we took a deep breath and braved the local Ikea to get actual eyeballs on the products.  We were in and out of the store as quickly as possible, before I failed a sanity roll when dealing with the SUV Soccer Mom Mafia (SSMM) that roams the suburban tundra around the Ikea mecca (*shakes angry fist at SSMM*). 

Anyway, with the valuable intel we needed, we retreated to our laptops to min/max the strategy (actual build configuration of the modular items) from the safety of our own country stronghold.  Then, for $29, had it all delivered to the house.

It was $29 well spent to have someone else collect all the bits and then hump them to my front door.

SSMM thwarted.  Hahahahaha.


Hellquest, Chapter 2: But ... the problem with the modular stuff is that upon delivery there was a very intimidating mountain of boxes in our entryway.   Each bit, each box, each morsel, has its own SKU, and came in its own packaging, with its own instructions.   Now instead of facing mortal combat with the SSMM, I stared down a huge puzzle quest with many possible false steps bearing mortal danger and shredded faux-plywood. 

I hauled the biggest boxes upstairs and began picking through them.  I retained all my fingers, escaped mortal peril from papercuts, and avoided scratching any finished surfaces by opening boxes with a utlity knife - which is something Ikea High Command expressly forbids in all of their hieroglyphs.

Here is where we stopped at the end of Chapter 2.  Backbone complete and all big boxes pillaged.  Now the details start.


Hellquest, Chapter 3:  Alas, there was a storyline complication.  One of the SKUs was missing from my packup - apparently the GM involved noticed my smugness-masked-as-praise when I bragged about the $29 delivery solution and decided I needed a wrinkle to keep things from being too straightforward.  I've been through the mountain of cardboard from top to bottom, and the promised 6 boxes of hinge hardware are missing.

Without a replacement, I couldn't complete the Hellquest and was forced complete a side quest to allow further progress.  My only alternative was to call upon the Ikea High Command and demand compensation for this outrage.

Or if that doesn't work, begging will ensue.


Hellquest, Chapter 4:  After 2 hours and 5 minutes of hold time with Ikea High Command, I was successful in the side quest.  For the next two days, I heard their hold music and looping messaging whenever I closed my eyes.

After a week's delay, the replacement hardware arrived at my doorstep.


Hellquest, Chapter 5:   It was a close thing, but negotiations with Ikea High Command were fruitful, allowing evil to be vanquished. 

I was a little nervous, because I didn't actually get any shipping info for the missing hardware until Friday.  But, FedEx h at it at my doorstep by 9am Saturday.  The quest was set to resume on Sunday afternoon.

Today after other chores, I steadied my nerves and went to install the doors.  This was mostly straightfoward, and I was able to assembly-line a lot of it, and it all went well.  I did have one hiccup with the hinge hardware - that failed to seat properly but felt secured - that caused me to de-install all the doors and put them back on.  Otherwise, I had very few adjustments.  I'll let things settle overnight and then see if I need to square-up anything.

The upper areas will become the home for my KDM and SoB collections, and Mrs. Zoxe's Super Dungeon Explore.  The lower areas will likely be crammed with all sorts of games, although presently it's hiding my KDM Wave 2 boxes and Gloomhaven.  I've not secured to the wall yet, but will - not sure if we want it along that wall or in the opposite corner. 

The pictures make it look smaller than it actually is.  Total width is just under 6 feet - the KDM Phoenix standing guard is one of my largest figures with a 12" wingspan.

The gaming surface was a $99 clearance find at our local Mendards.  It's 53 x 40 and enough room to play most anything. 


Quest Complete! On to the next!  KDM Phoenix standing guard.

We found the very large coffee table on clearance at a local home improvement store - $99! and it's big enough to play most anything.


Now, back to town to find solace at the local public house and await our next adventure.

Sunday, June 3, 2018

ZPS - May 2018


Well, this sets an a precedent that I'm not all that comfortable with.  The very last post was the April ZPS and here we are in June already.  There's a lot going on, but I'm choosing not to post about my contest entries, so that means very little to actually say here.

1. On the Table:
  • GenCon Project #1 - Last month I was doing assembly.  This month I'm perhaps past halfway through.  I'm doing a 'squad' of SoB figures for this project.  I'm kind of excited about it; it's some of my best work to date.  I've been able to combine some of the airbrush techniques I learned through the KDM builds this winter with some of the hand-brushing ideas that Miniature Monthly has taught me.  Is it world-class? Oh, heck no.  But it's some of my best work.  As they say: #donenotperfect.
  • GLOOMHAVEN - We've officially started our campaign.  I can kind of sit back and sigh about why this game has drawn so much positive attention.  Loving it so far.
  • Convention Planning - GenCon's event queue processed.  Once again we got a high queue number despite being online and clicking the second the selection engine went live.  So, no SoB.  No KDM.  No Elizabeth Beckley painting sessions.  But, as it turns out, the authors of one of my favorite book series - James S.A. Corey of the Expanse will be the keynote authors, and we'll be filling our time with meet and greets and such.  Plus a 1250 point battle for DropFleet (more below).  Fun with friends, a late evening class on basing and we still have a very full GenCon weekend.  
  • More Convention Planning - PAX Unplugged tickets went live.  We bought a 3 day pass and have a nice room at the Marriott (attached to the convention center).  After years of really hating Philly for their crappy airport during work travel, it kind of pains me to say this: "I'm pretty excited to head back to Philly this fall."
  • Yet more Convention Planning -  Labor Day weekend we'll be in Texas for ReaperCon.  The event list isn't up, but we're looking forward to another road trip.  Yes, we'll be driving from the upper midwest to Texas.  Call us crazy.
2. Gaining Momentum:
  • DropFleet Commander.  As I mentioned above, I signed up for a friendly 1250pt battle at GenCon.  That means that I not only need to get my starter box fleet painted, I also need to get the Battlefleet Box opened, assembled, and painted.  I put the SoB project first, but at the rate that I paint DFC is probably going to consume a good chunk of the summer.  But I'm a little scared about getting this done in time.
3. Losing Traction:
  • KDM Wave 2.  All of my expansion boxes are still where I left them.  I'm trying to crank through the GenCon projects first, and actually want to savor the KDM builds I will enjoy later.  Still, I see other people's Wave 2 work in progress and get jealous. 
4. Going, going, gone.
  • I'm a little concerned about Gencon Project #2, which is focused on some SodaPop figures I picked up.  I'm worried about getting everything done by August, and this is the last project on the priority list.  On the other hand, the figures weren't cheap and I'll have wasted that investment if I don't pull it off.